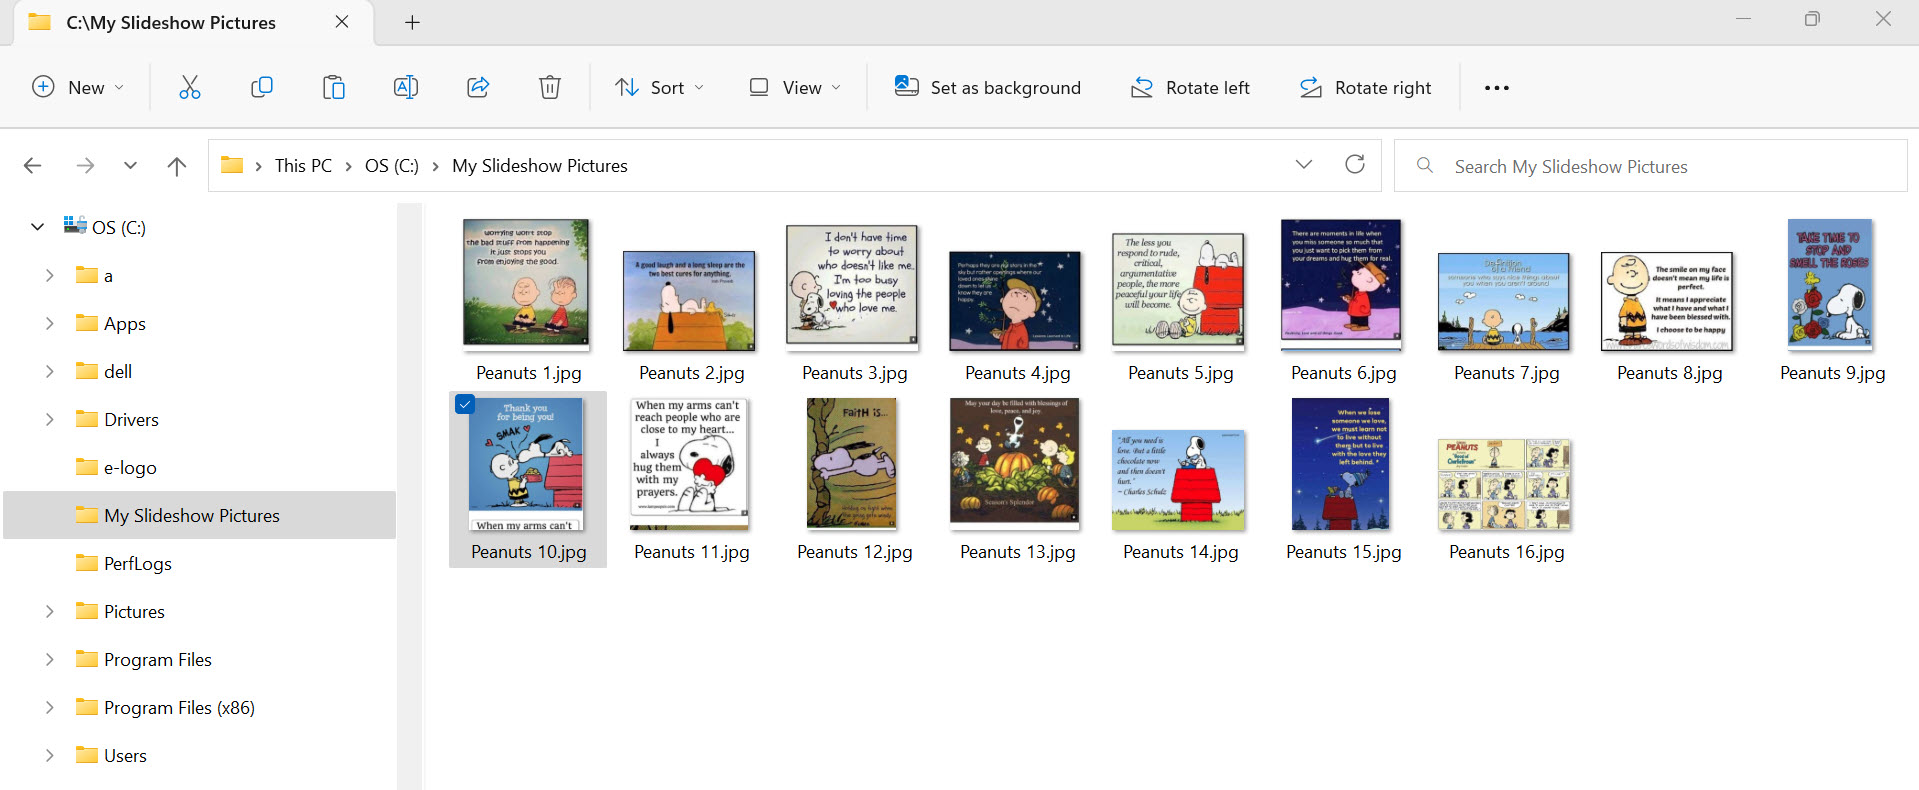
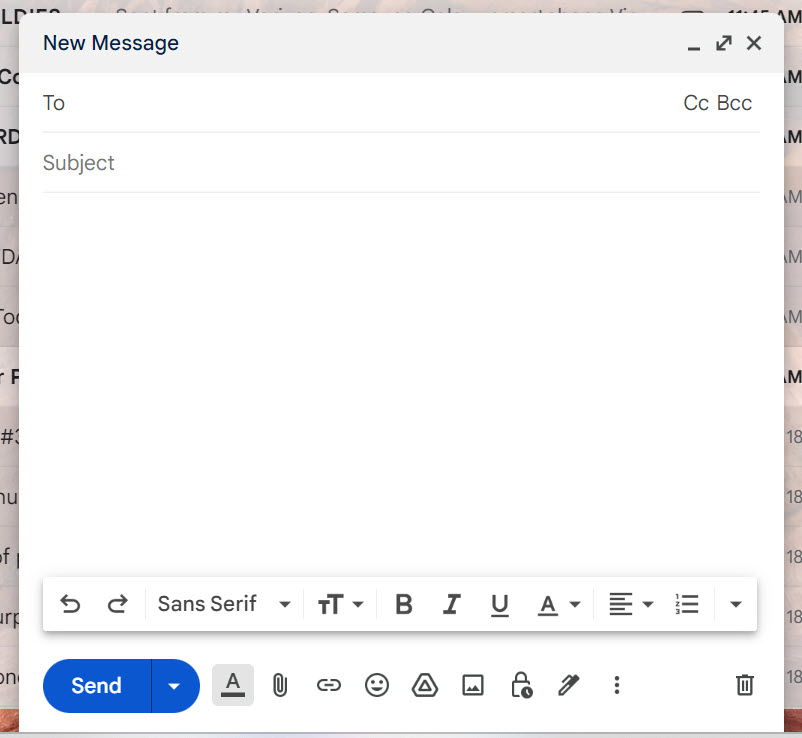
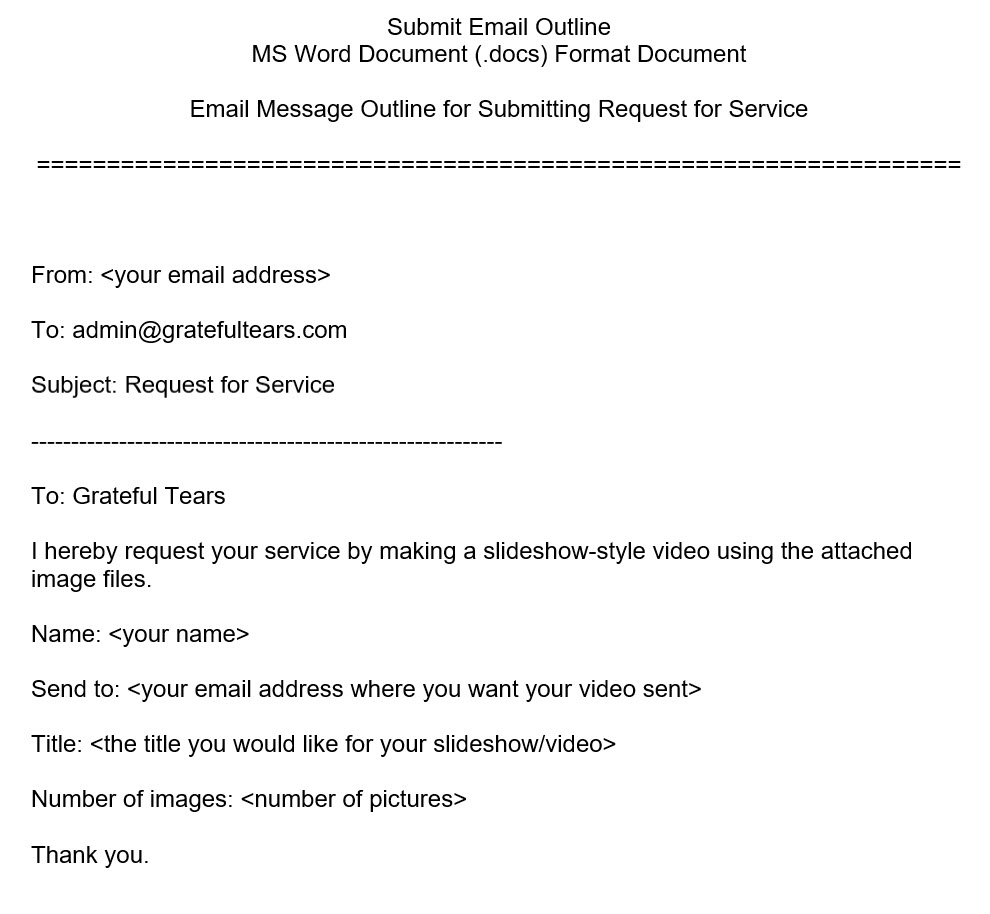
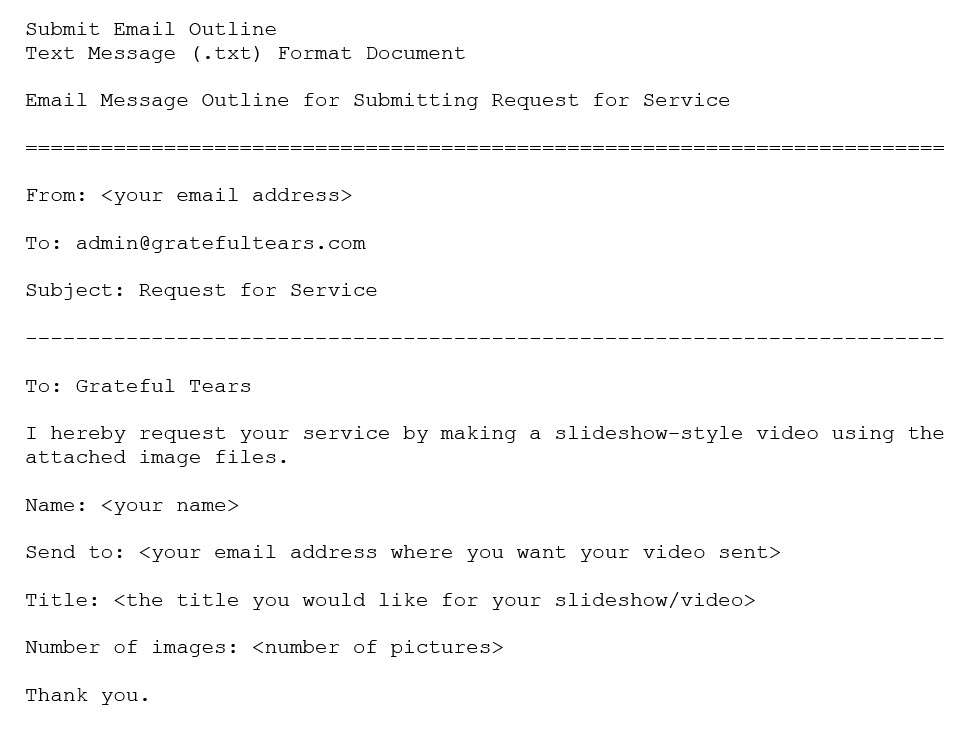
|
|
|
|
How To Request Service
|
|
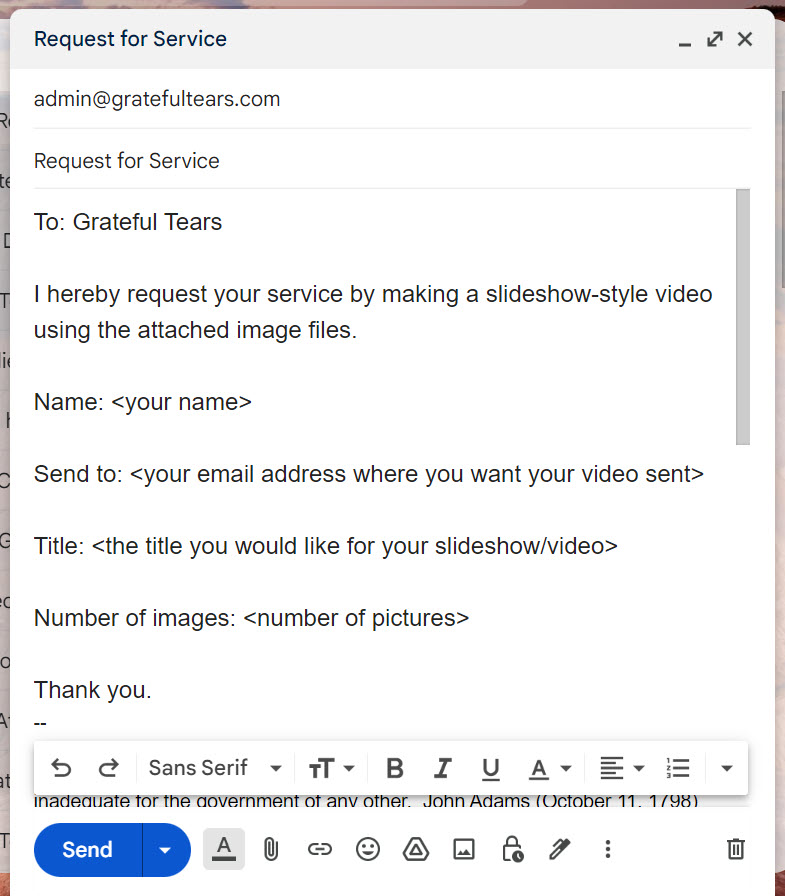
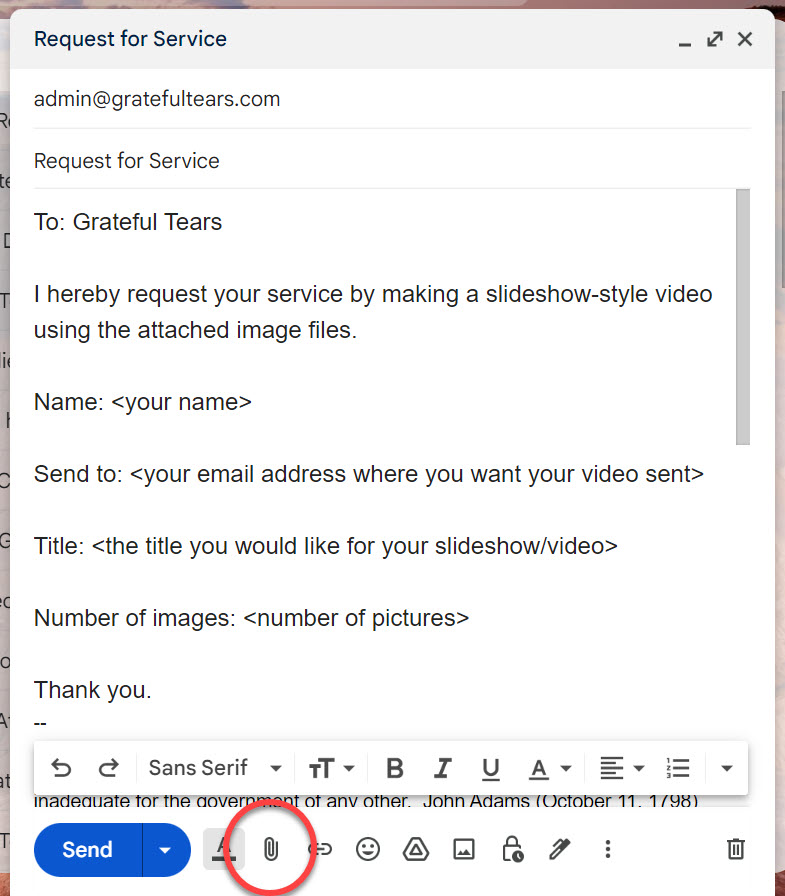
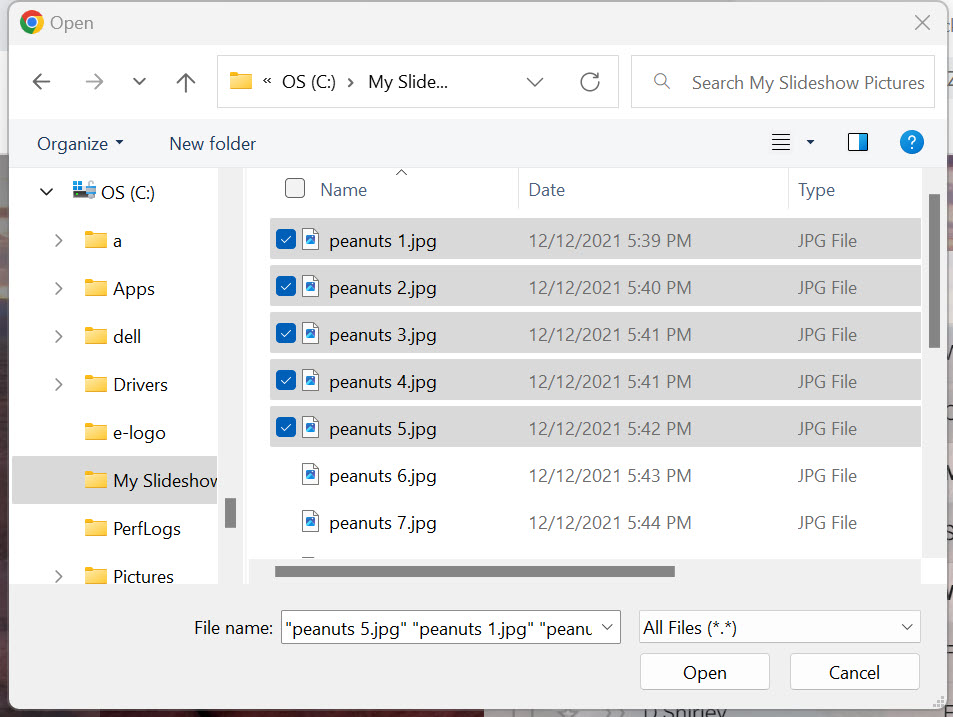
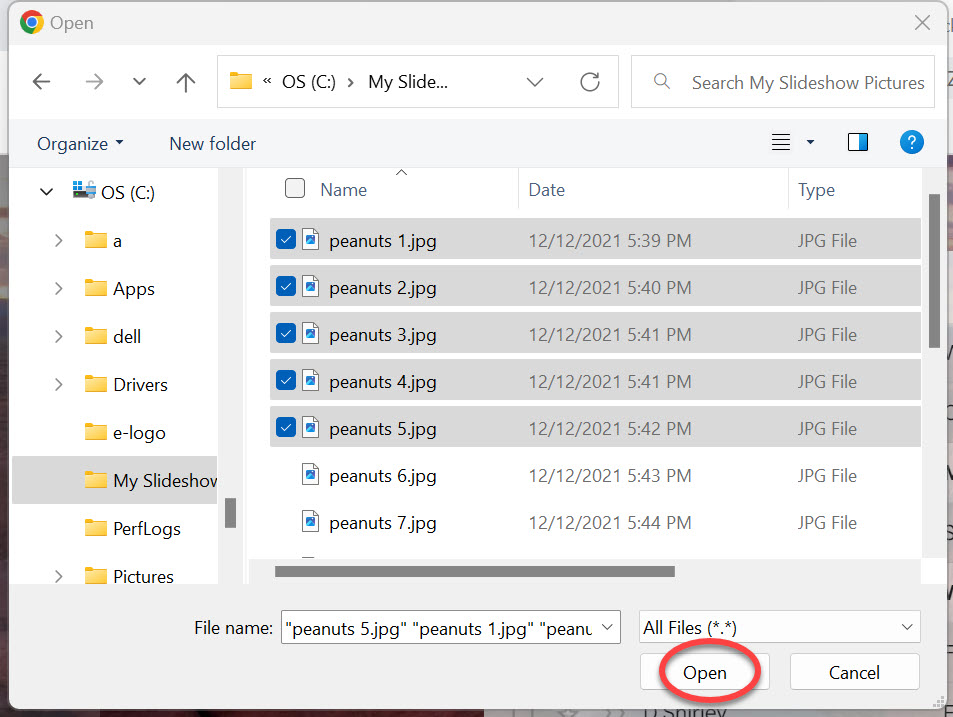
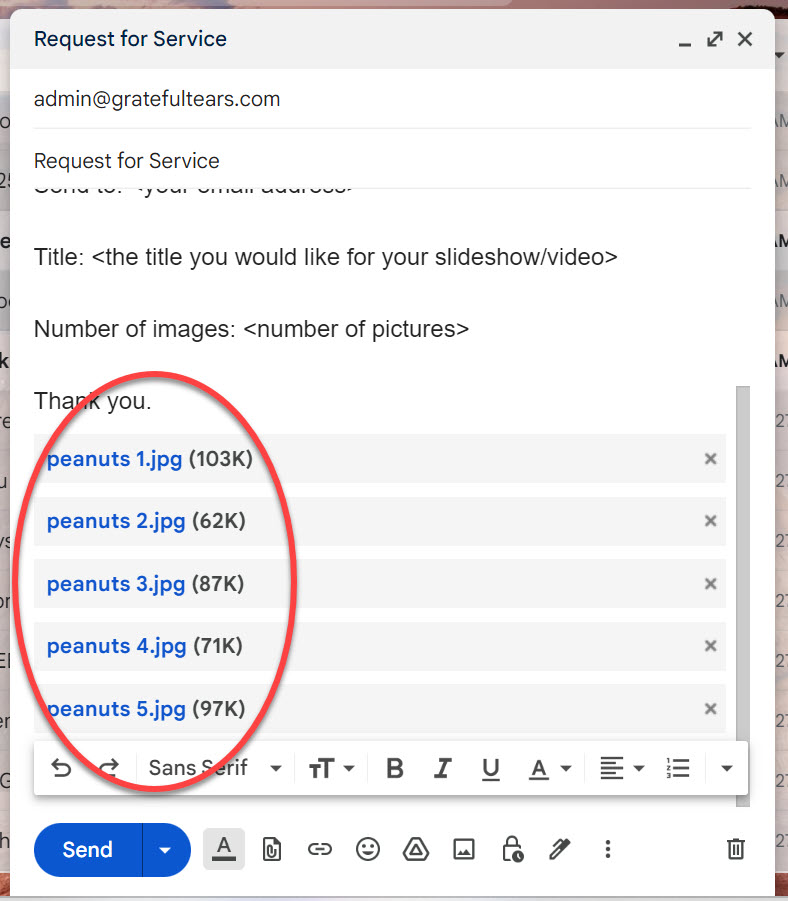
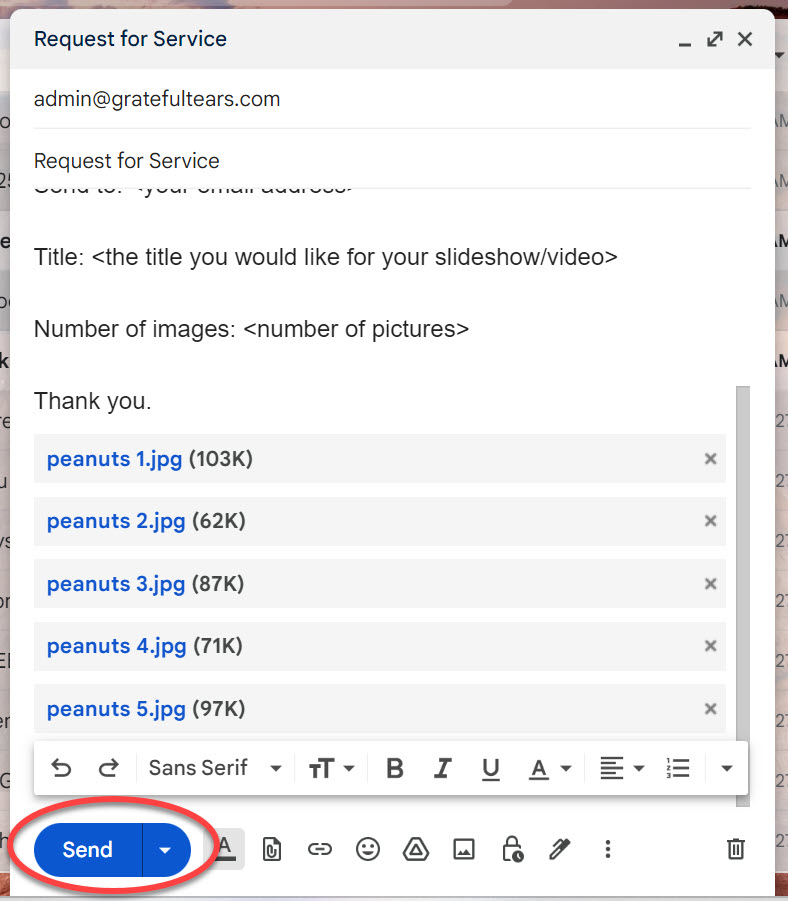
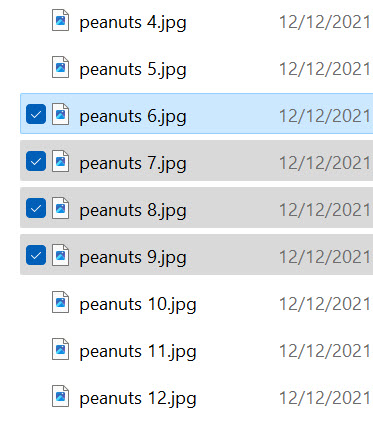
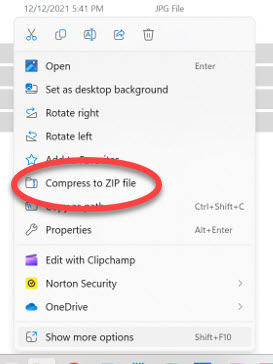
Using our service to create a slideshow-style video of your pictures or still images is based upon your submitting to us what we call a ‘Request for Service’ in which you give us certain information that identifies who you are, how we can contact you, and certain other informaton (such as a title to use for your video). The ‘Request for Service’ will also contain the picures/images that you want included in your video. On this page, we provide detailed instructions about how you can prepare your ‘Request for Service’. If you are already familiar with and proficient in working with files on your computer (like copying-and-pasting files, creating folders, naming and re-naming files, attaching files to an email messsage, etc.), you might want to use our ‘Quick Order’ form for submitting your ‘Request for Service’. If so, Click here to submit a ‘Quick Order’ for your video. We strongly recommend that you read, understand, and agree to ‘Our Policies’ as presented under a separate heading on our web site. You can read ‘Our Policie’s by clicking here The following instructions, images, illustrations, and outline are based on the use of a PC computer operating under the Microsoft Windows 11 operating system. The details and images in these instructions may vary if you are using a different computer, operating system, or electronic device; for example, if you are using a PC computer operating under the Windows 10 operating system, or if you are using an Apple/Macintosh device. The general concepts and procedures should apply to any similar device, however. We will use the pictures from the ‘Peanuts Wisdom’ example project in the illustrations for the following instructions. You can view the ‘Peanuts Wisdom’ example project (and other example projects) by clicking here. |
|
Page Navigation
Top of Page
Preliminaries
Collect Your Pictures
Put Pictures In Order
Submit Pictures To Grateful Tears
Preliminaries
|
ID |
INSTRUCTION |
ILLUSTRATION |
|
100 |
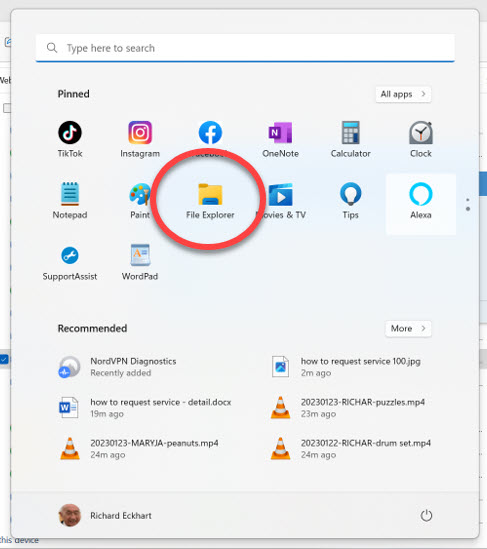
We recommend using File Explorer in Windows 11 to perform the operations described in this document. We will use images and instructions appropriate for File Explorer in the following instructions. You can find File Explorer by clicking the ‘Start’ button. Doing so will show a number of options that should include the icon for File Explorer. |
|
|
101 |
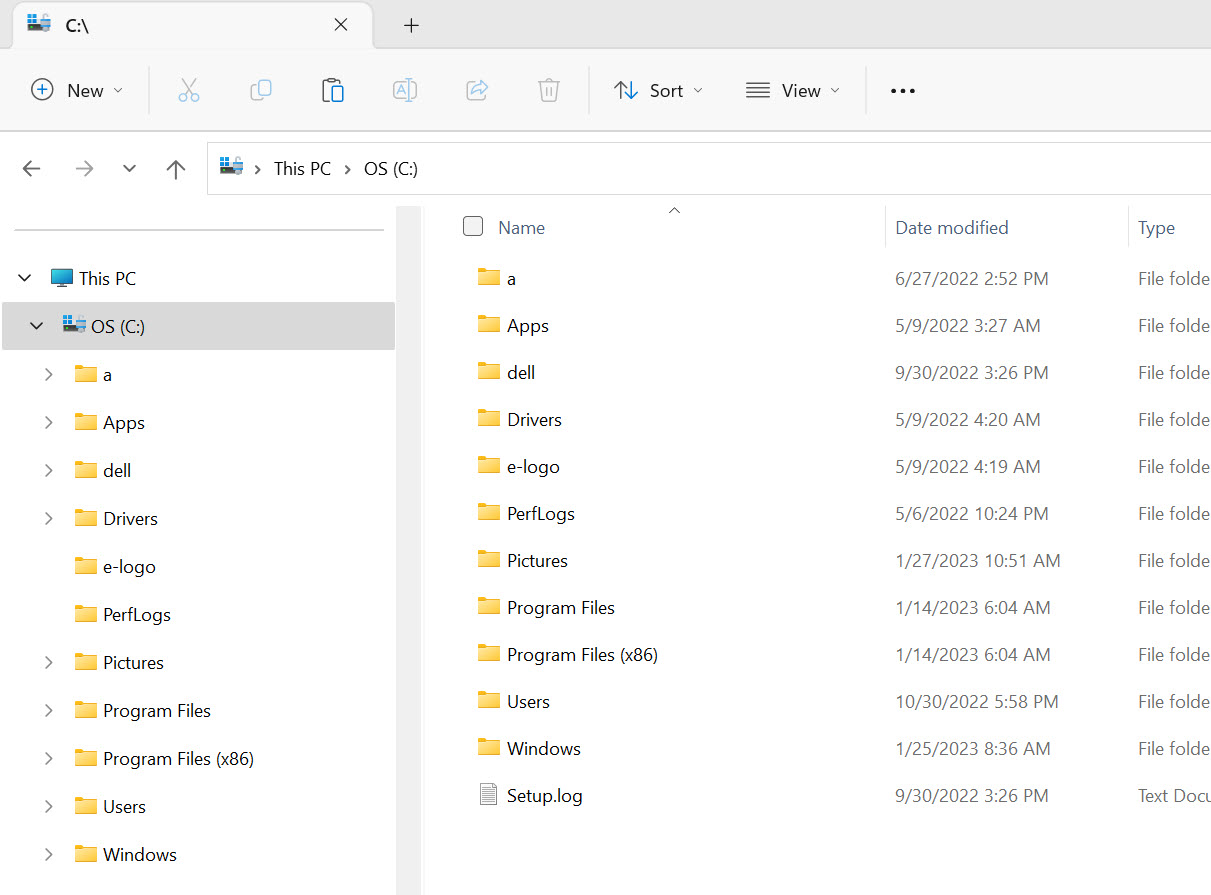
Click on the File Explorer icon to open a window that will look something like this: |
|
|
102 |
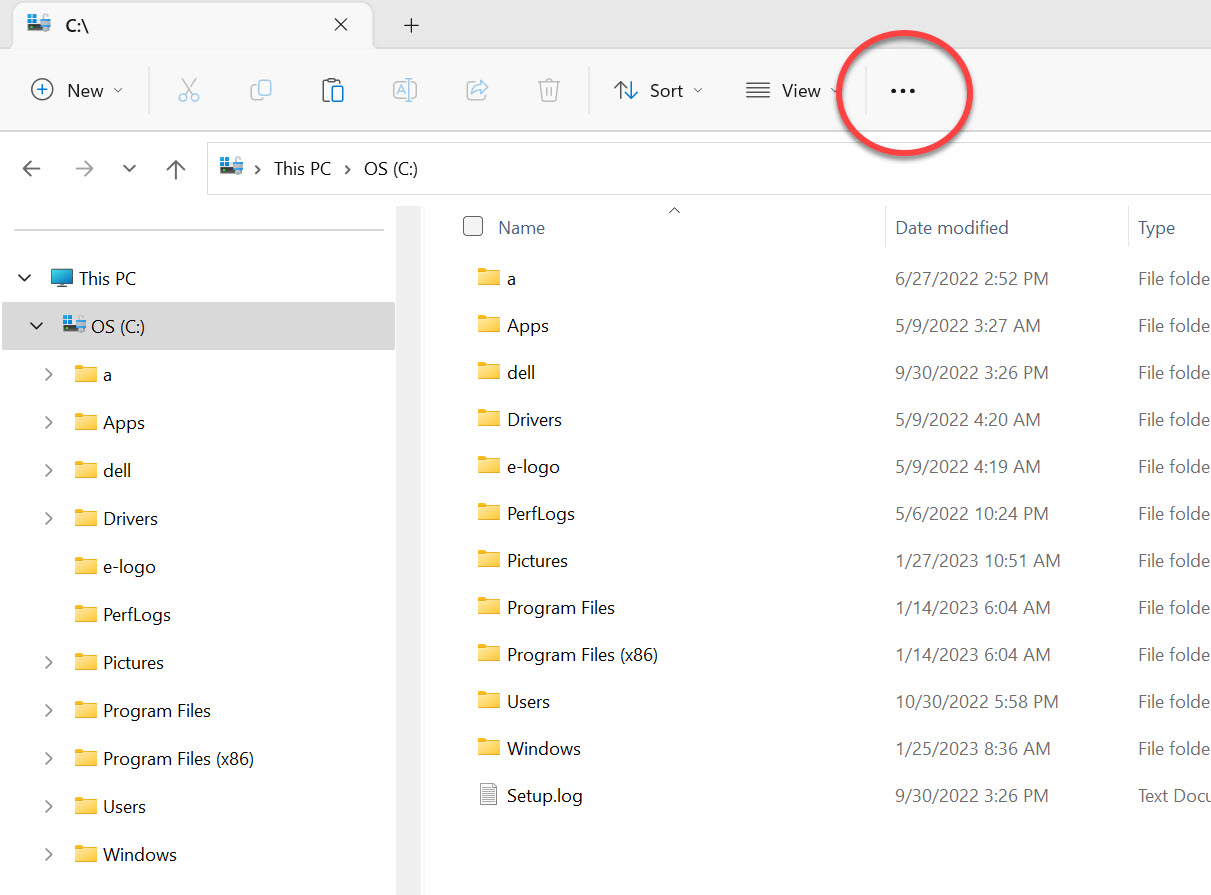
Click on the three dots on the File Explorer window. This will drop down a list of options. |
|
|
103 |
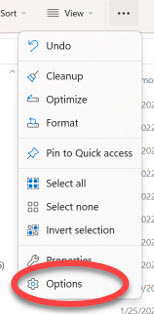
Click on ‘Options’ from the drop down list. |
|
|
104 |
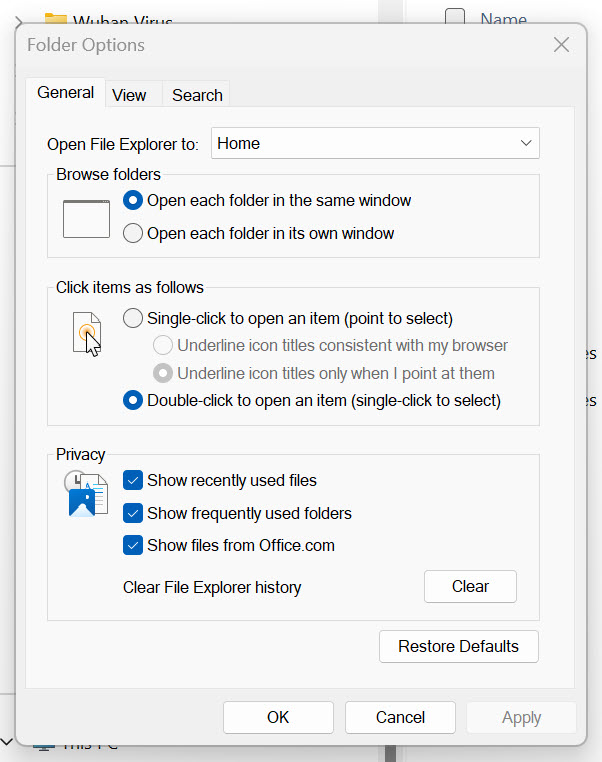
Clickng on ‘Options’ will open a ‘Folder Options’ window that looks like this. |
|
|
105 |
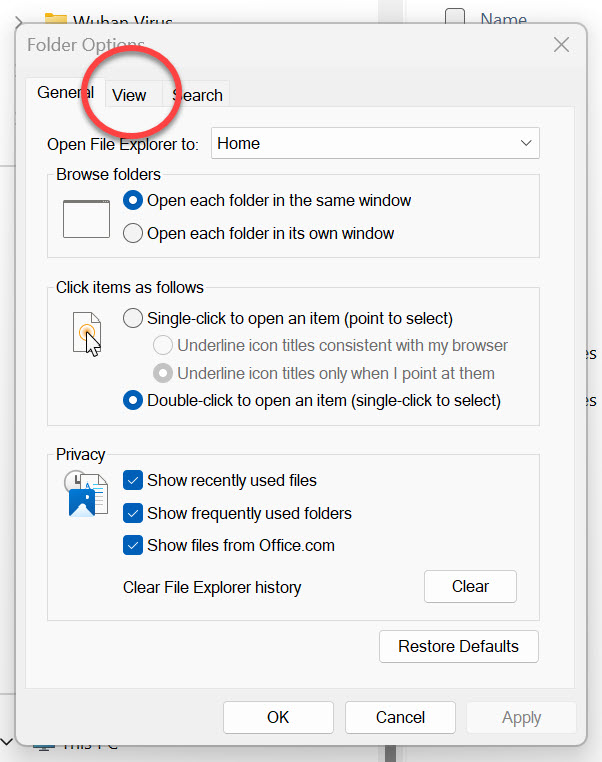
Click on ‘View’ to open the View version of the Options window. |
|
|
106 |
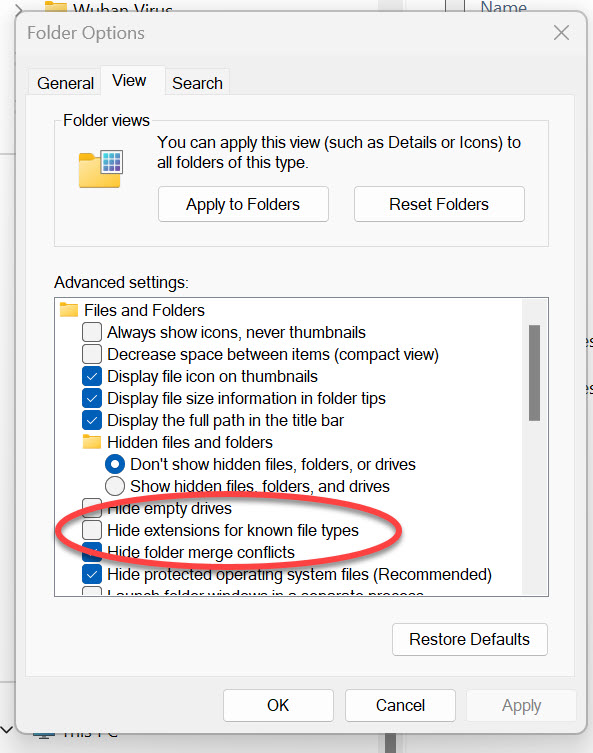
De-select or un-check the ‘Hide extensions for known file types’ option. The check box on the left should NOT be checked. |
|
|
107 |
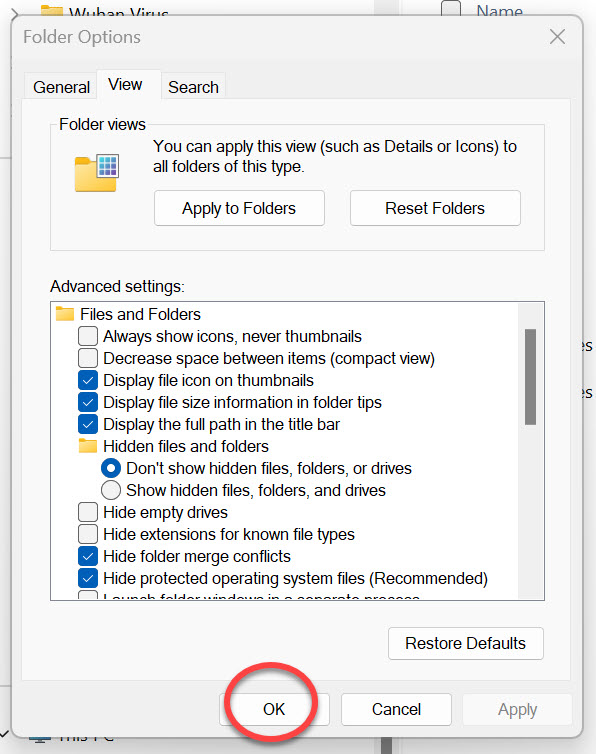
Click the ‘OK’ button to close the Folder Options window and return to the File Explorer window. |
|
|
108 |
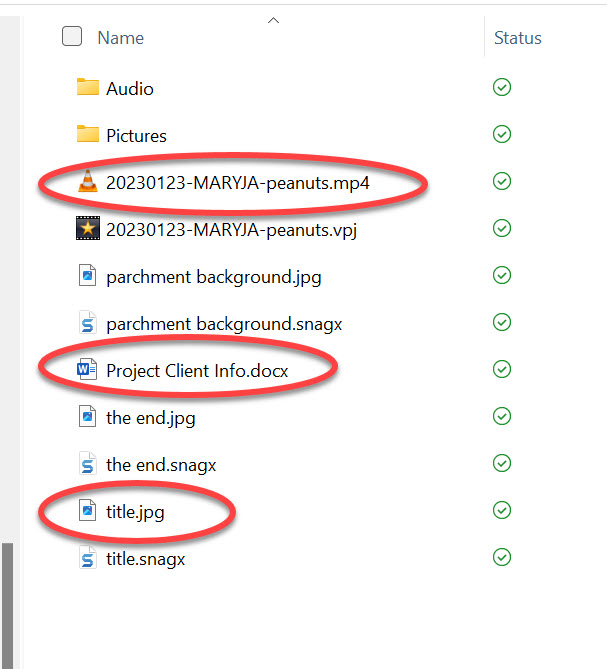
De-selecting or un-checking the ‘Hide extensions for known file types’ option as above will cause full file names to be displayed in Windows Explorer as shown in the image. Full file names include the file’s extension which indicates the type or format of the file. Full file names are composed of two parts: the name of the file itself and the file’s extension which indicates the type or format of the file. The file name itself is that portion of a full file name to the left of the decimal point or period. The file’s extension is that portion of the full file name to the right of the decimal point or period. For the files shown in the image, the file extension ‘mp4’ indicates that it is a video file; the file extension ‘docx’ means that it is a Microsoft Word document file; and the file extension ‘jpg’ indicates that it is a jpeg-formatted image file. |
|
Page Navigation
Top of Page
Preliminaries
Collect Your Pictures
Put Pictures In Order
Submit Pictures To Grateful Tears
Collect Your Pictures
|
ID |
INSTRUCTION |
ILLUSTRATION |
|
200 |
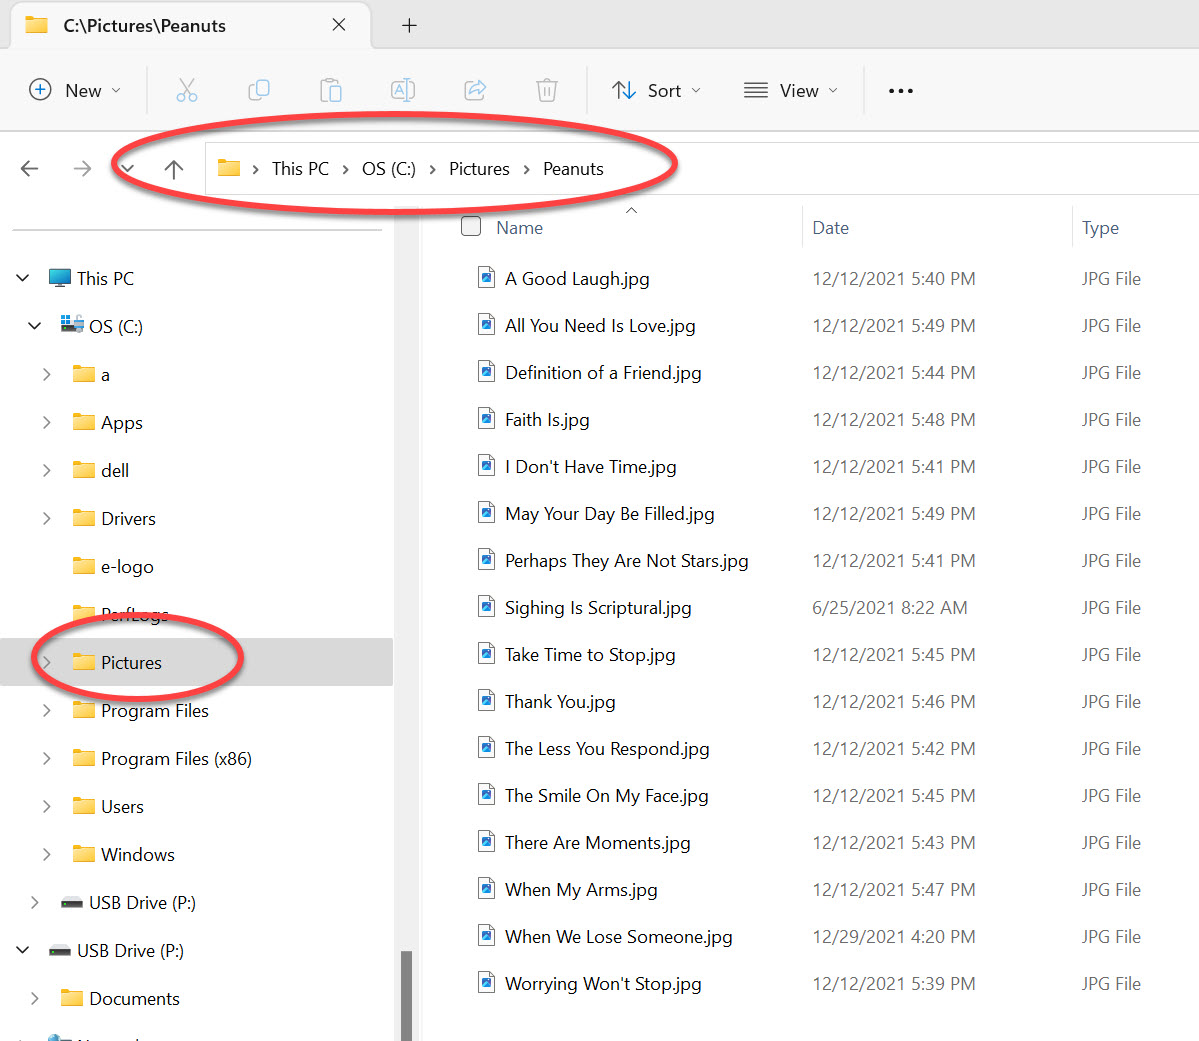
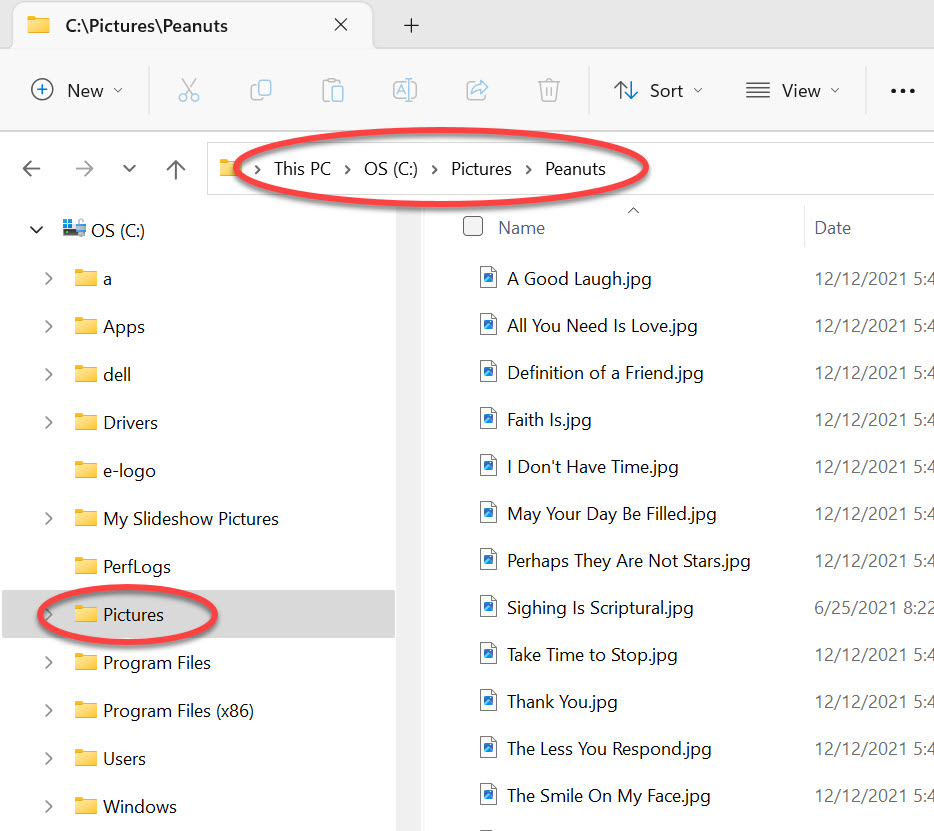
The pictures we want for our slideshow video are contained in the folder ‘Peanuts’ as shown on the illustration at the right. So this is the fundamental source of the pictures we will want in our video. It’s possible that all of the pictures for the video might come from other folders on your computer as well. You will select the pictures you want from any and all folders for your source pictures. For our illustration, we will assume all pictures come from only one source folder; namely, the ‘Peanuts’ folder only. |
|
|
201 |
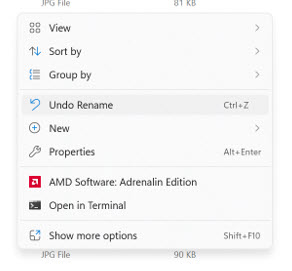
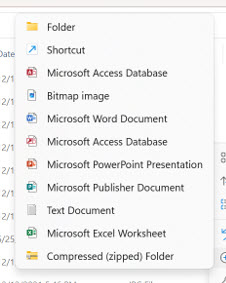
We suggest that you create a new folder that will contain all of the pictures you want for your video. You can create a new folder as outlined in the following steps. Right-mouse-click on the right side of the File Explorer window. This will drop down a window of options as shown on the right. |
|
|
202 |
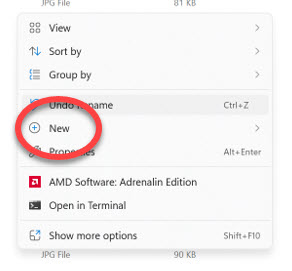
Hovering the mouse over and clicking on the ‘New’ option will drop down another options window as shown on the right. |
|
|
203 |
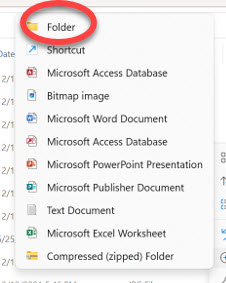
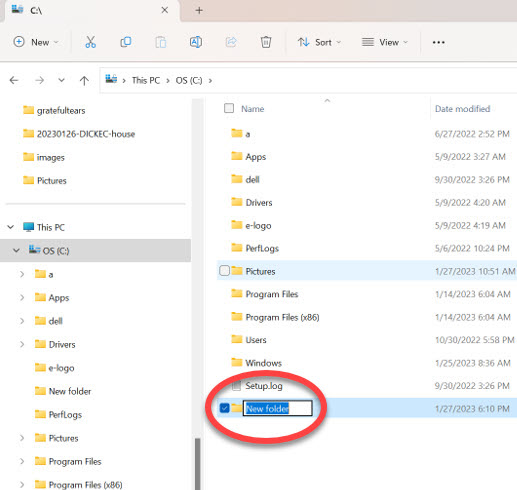
Click on the ‘Folder’ option and a new folder will be created in the File Explorer window. |
|
|
204 |
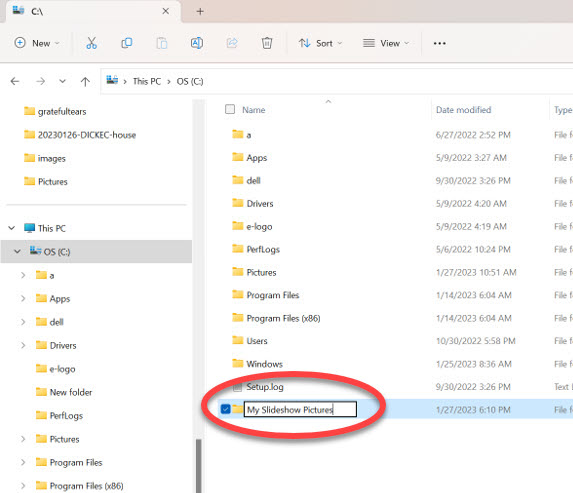
Type in the name you want for the new folder. In our example, we will use the name ‘My Slideshow Pictures’ for the name of the new folder. |
|
|
205 |
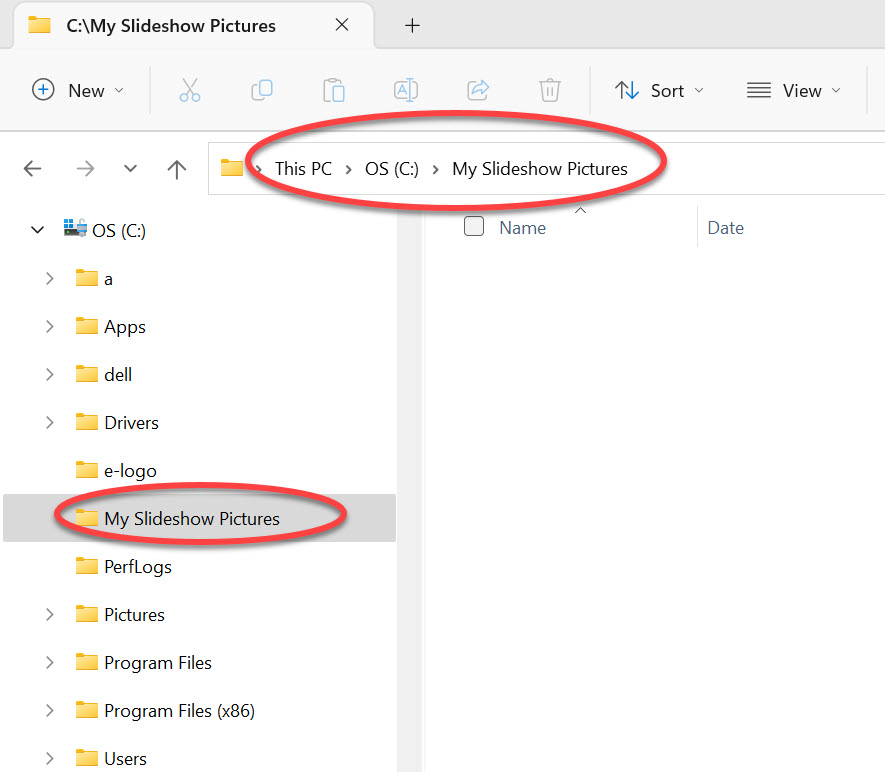
At this point, our source folder (Peanuts) should look like this. It is from this folder that we will copy-and-paste our pictures to the new folder ‘My Slideshow Pictures’. The new folder (My Slideshow Pictures), however, is empty at this point and should look like this. |
|
|
206 |
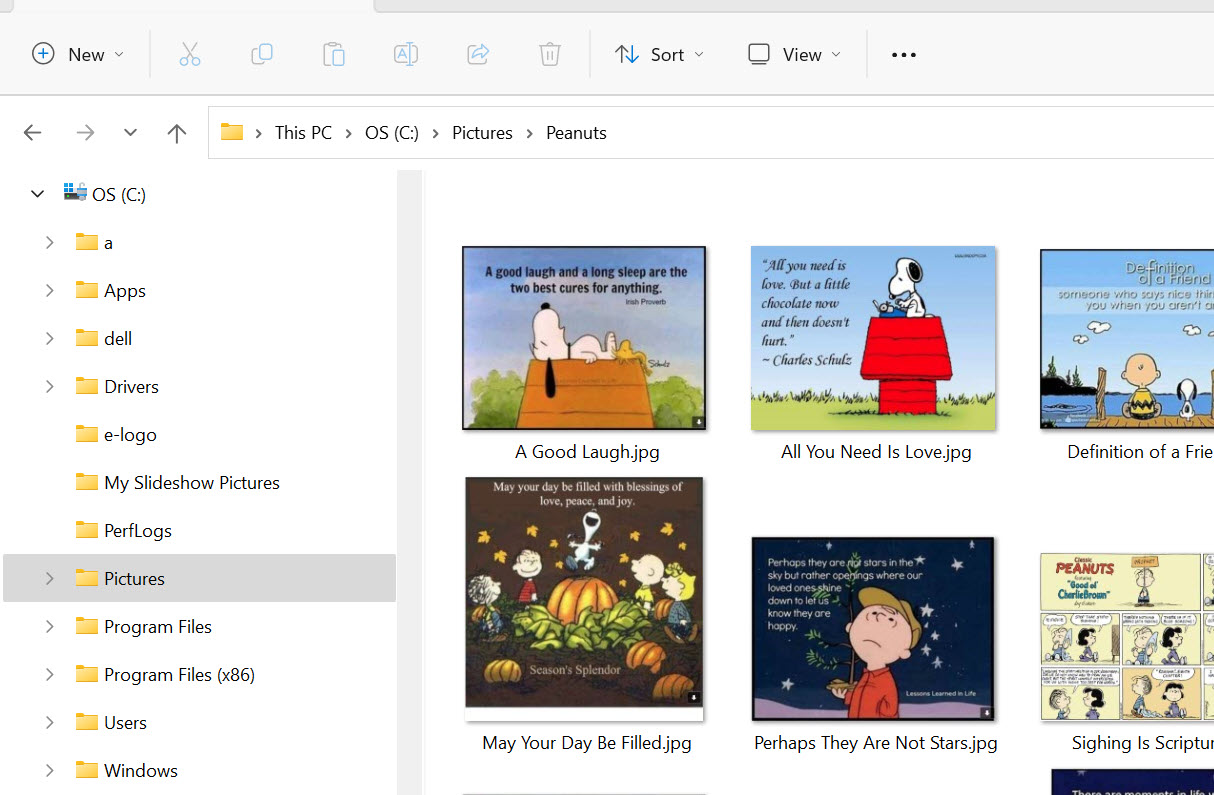
You can change the view of the picture files in the ‘Peanuts’ folder to look like that on the right. In this view, the picture files are shown in the ‘Peanuts’ folder as picture icons. |
|
|
207 |
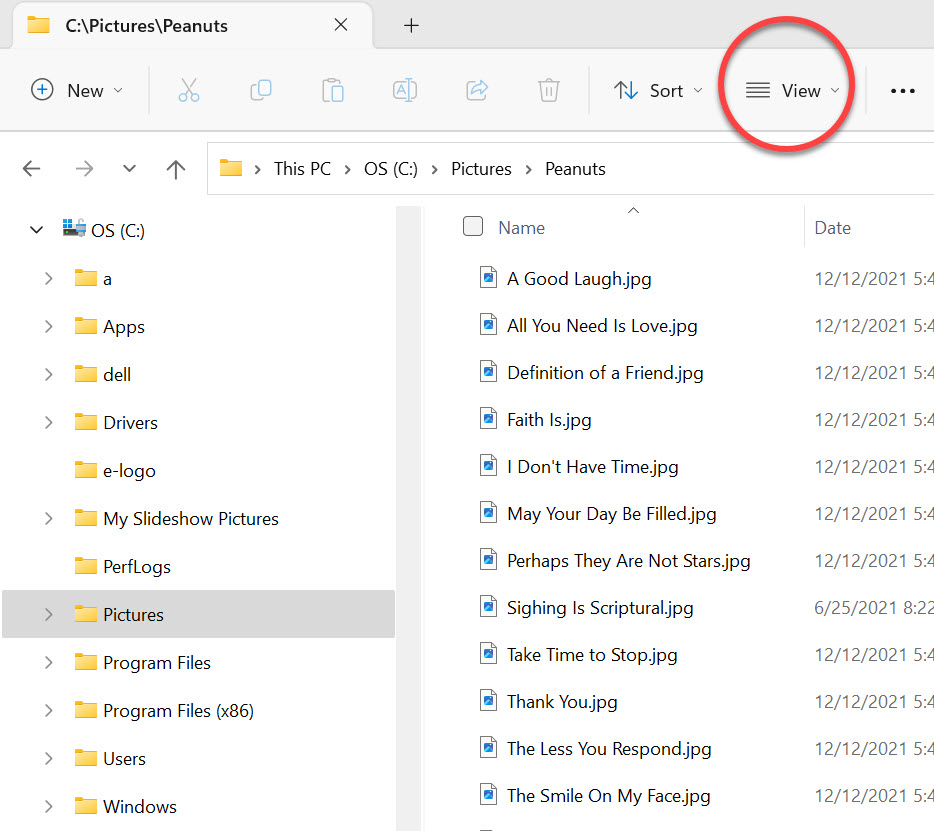
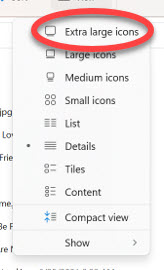
To see the picture files as picture icons, click on ‘View’ in the File Explorer window. This will open a drop down window with several choices. Click on the ‘View’ option you want. For our example, we will select the ‘Extra large icons’ option. The list of picture files will look like that above. |
|
|
208 |
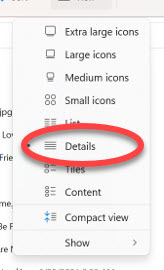
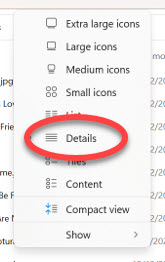
If you want to go back to the file name listing, click on ‘View’ and then select ‘Details’ from the drop down window. |
|
|
209 |
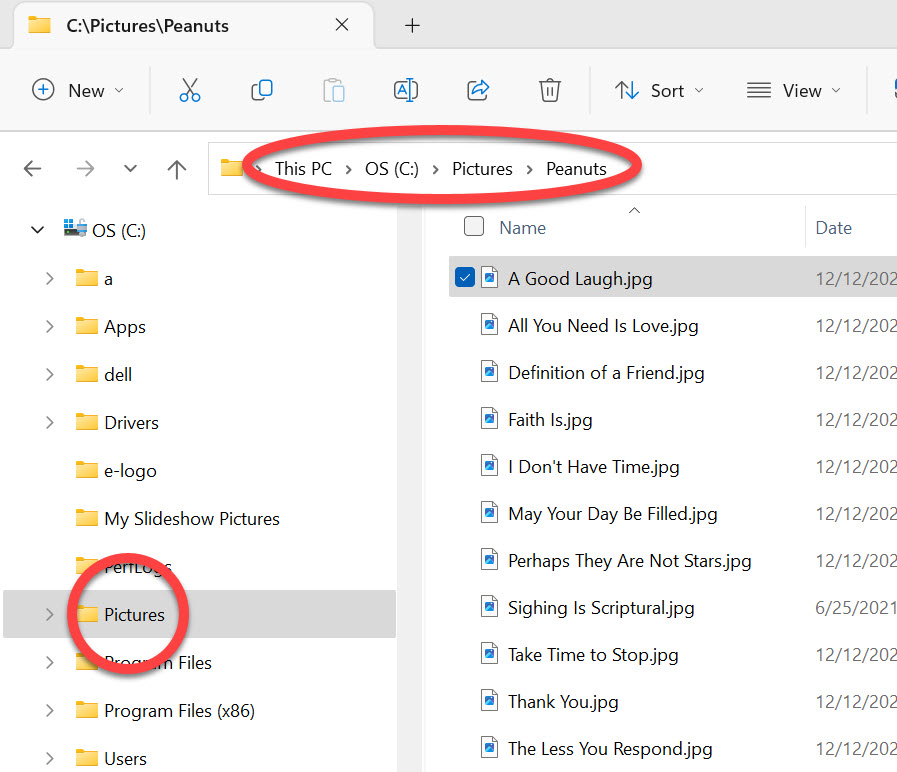
Now we will copy the picture files from the ‘Peanuts’ folder and paste them into the ‘My Slideshow Pictures’ folder in the next steps. In the ‘Peanuts’ folder, select a picture file by clicking on its name. The file name will highlight as shown. |
|
|
210 |
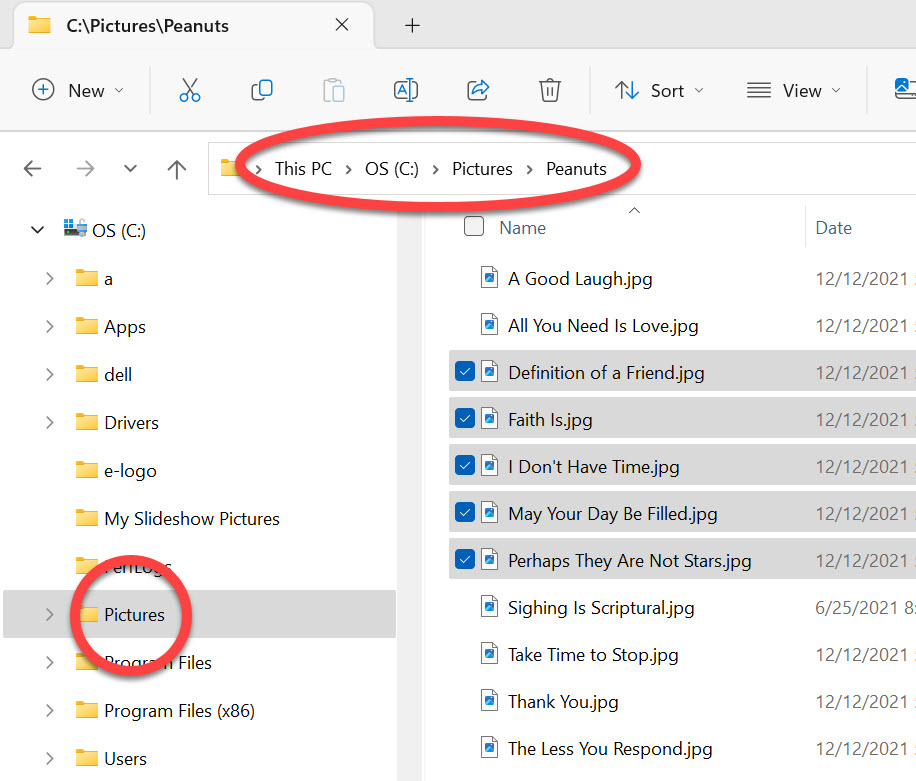
To select more than one picture file, hold down the <Ctrl> key on the keyboard while you click on each individual picture file name you want to include in the multiple selection of files. Your selection(s) will look like this. |
|
|
211 |
To copy the selected file(s), hold down the <Ctrl> key on the keyboard and press the <C> key. This will copy the selected file(s) to the computer’s ‘Clipboard’ storage area. |
|
|
212 |
Now open the ‘My Slideshow Pictures’ folder and paste the copied picture file(s) from the computer’s ‘Clipboard’ storage area to the ‘My Slideshow Pictures’ folder by holding down the <Ctrl> key and pressing the <V> key. The result of the copy-and-paste operation should look like this (before and after the copy-and-paste operation). |
|
|
213 |
Continue the copy-and-paste operation until all of the ‘Peanuts’ folder’s picture files have been copied to the ‘My Slideshow Pictures’ folder. The result should look like this. |
|
|
214 |
All of the ‘Peanuts’ folder pictures should now have been copied to the ‘My Slideshow Pictures‘ and the resulting ‘My Slideshow Pictures‘ folder’s file list should look like this in its ‘Large icon’ view configuration. |
|
Page Navigation
Top of Page
Preliminaries
Collect Your Pictures
Put Pictures In Order
Submit Pictures To Grateful Tears
Put Pictures In Order
|
ID |
INSTRUCTION |
ILLUSTRATION |
|
300 |
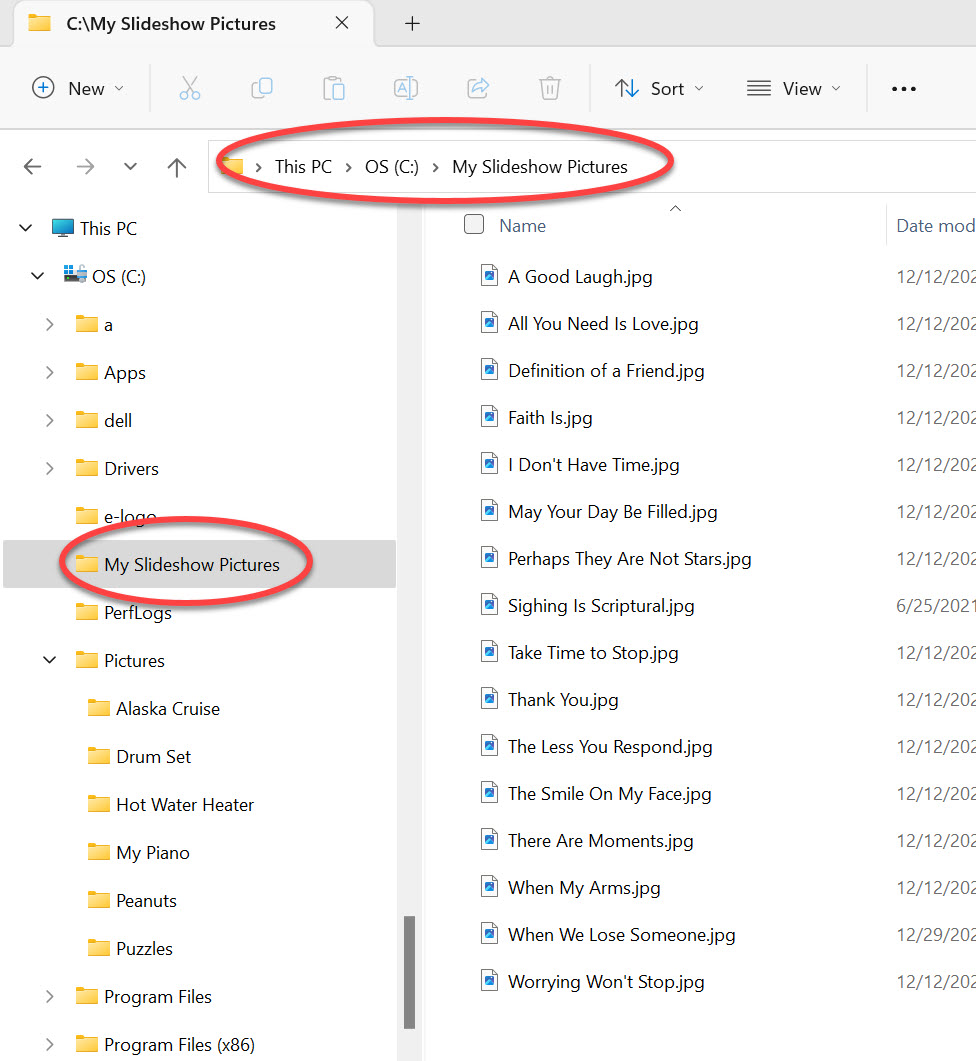
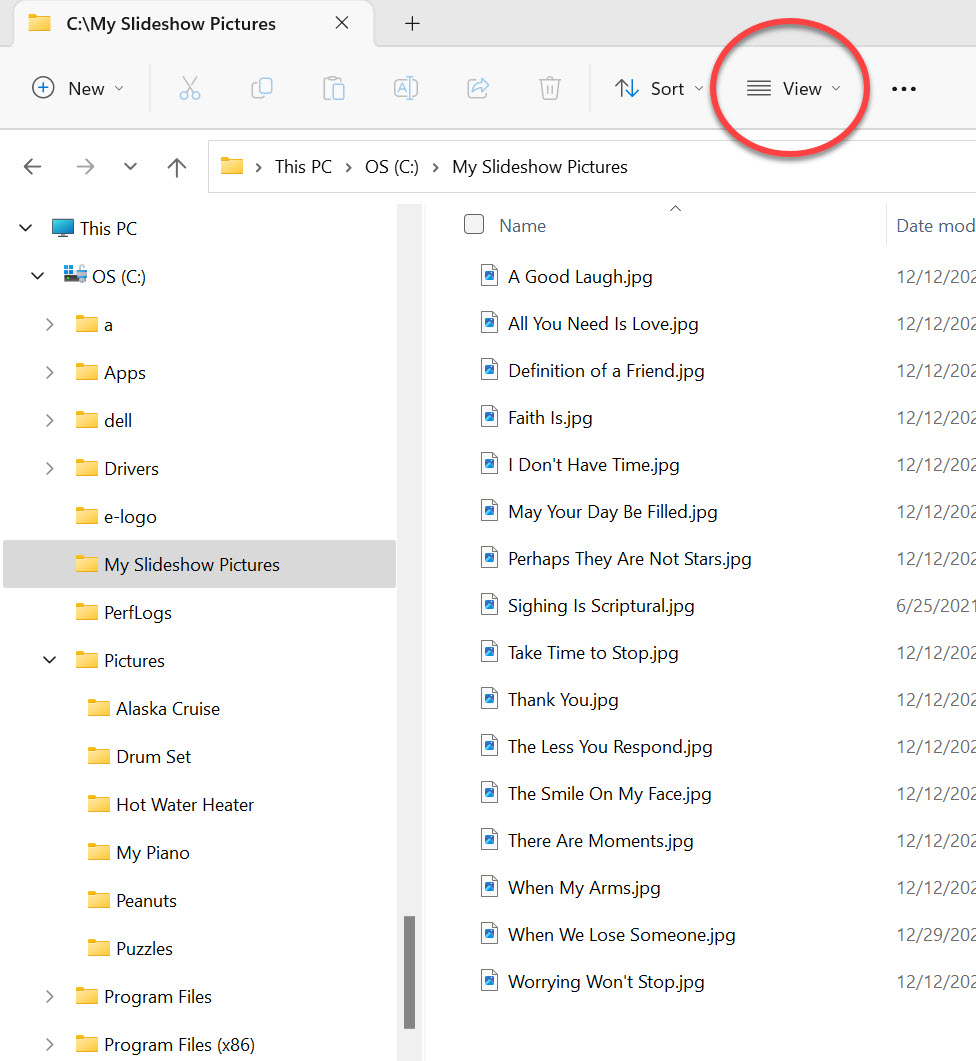
At this point, you will have collected all your pictures/images into one folder (My Slideshow Pictures). Looking at that folder with File Explorer should look something like that shown to the right. |
|
|
301 |
You can look at the contents of your picture folder in a different format. Find the ‘View’ option on the File Explorer page. |
|
|
302 |
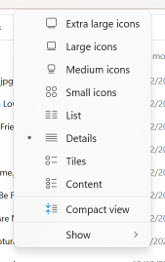
Clicking on the ‘View’ option on the File Explorer page will drop down a list like that shown to the right. |
|
|
303 |
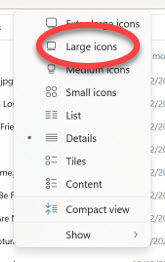
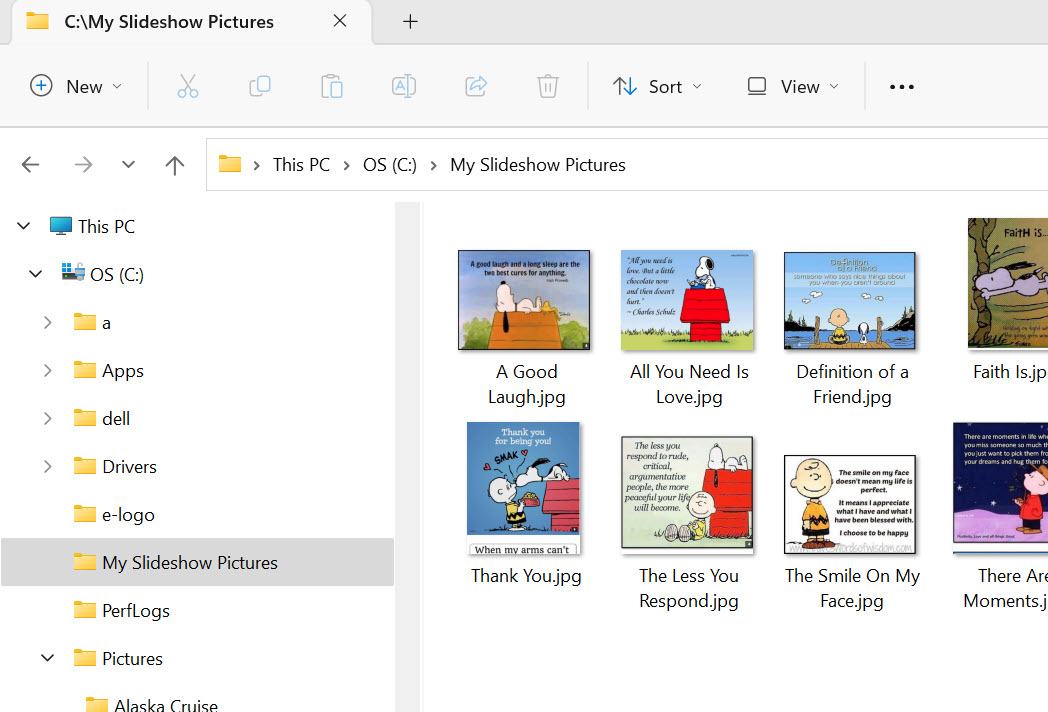
Click on the ‘Large Icons’ option in the list. Selecting the ‘Large Icons’ option will change the file listing to appear as icons on the File Explorer page as shown on the right. You might find this format preferable and more convenient to work with in putting your pictures/images in the desired sequence. |
|
|
304 |
If you want to go back to the original file listing format, you can drop down the ‘View’ options and select ‘Details’ from the drop down list. For the purposes of these instructions, we will continue with the ‘Large Icons’ format of the File Explorer page. |
|
|
305 |
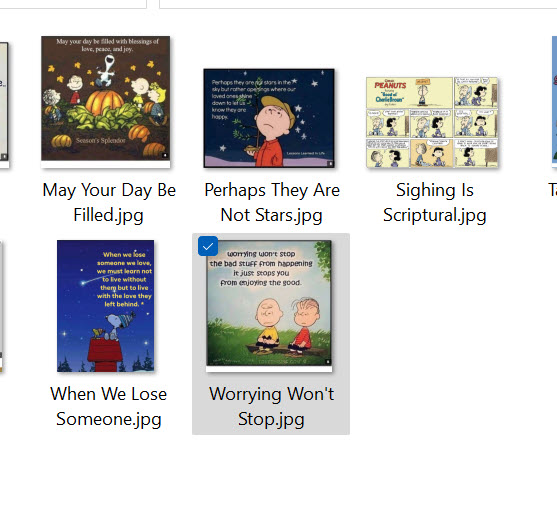
The easiest way to put the picture/image files in a specified sequence is to change the names of the files to indicate the sequence. This is the procedure we will use here. For the set of pictures shown, we will make the file with the name ‘Worrying Won’t Stop.jpg’ the first file in the new sequence. To change its name, click on the file. This will cause its icon to be highlighted as shown. |
|
|
306 |
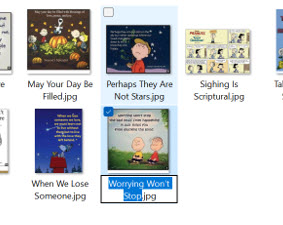
To change the indicated file name, click on the file again. This will cause the highlighting of its name to change to look like that shown. Note that only the part of the file name to the left of period/decimal point is highlighted. This is the part of the name that we will change to ‘peanuts 1’ to indicate the first file in the new sequence. |
|
|
307 |
Type in the new file name (‘peanuts 1’) and press the <Enter> key on the keyboard or click away from the selected file. The file name will now have been changed to ‘peanuts 1’ as shown. Notice also that the pictures have changed positions in the list to correspond to the change in the names of the picture files. DO NOT CHANGE OR REMOVE THE FILE EXTENSION (the part of the full file name to the right of the period/decimal point). Also, DO NOT remove the period/decimal point that separates the file name from its extension from the full file name. |
|
|
308 |
Repeat the name-changing procedure until all the file names have been changed to indicate the desired picture sequence: When finished, the icon format for the File Explorer page should look something like the picture on the right with all files having their new names which indicate their desired position in the sequence. |
|
|
309 |
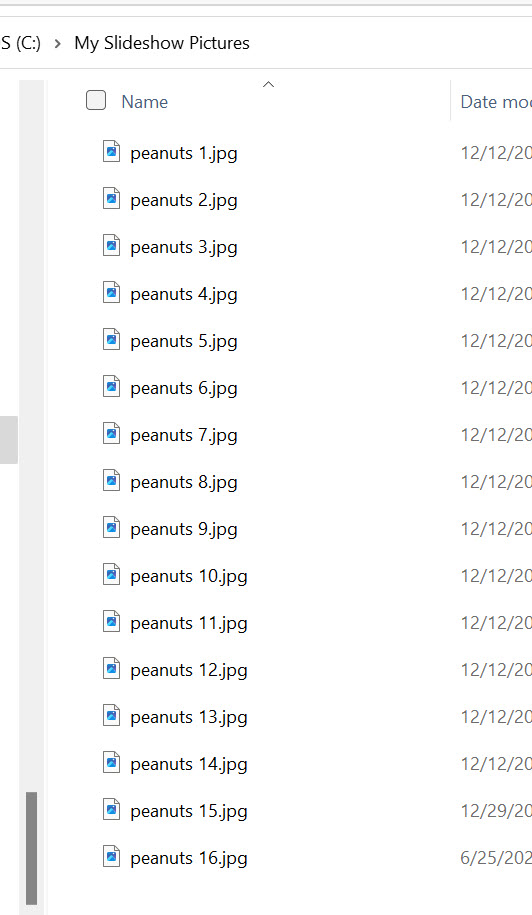
In the ‘Details’ format, the File Explorer page should look something like this. |
|
|
310 |
In the ‘Large icon’ format, the File Explorer page should look something like this. |
|
Page Navigation
Top of Page
Preliminaries
Collect Your Pictures
Put Pictures In Order
Submit Pictures To Grateful Tears
Submit Pictures To Grateful Tears
Page Navigation
Top of Page
Preliminaries
Collect Your Pictures
Put Pictures In Order
Submit Pictures To Grateful Tears


